Disk Utility or VeraCrypt: How should you encrypt files on a Mac?
I used TrueCrypt to encrypt files when I was a Windows user. It let me create an encrypted file container, mount it as a virtual disk, and easily access its contents through File Explorer.
TrueCrypt was discontinued in 2014, and VeraCrypt became its successor.
Recently, I needed to protect some files that I wanted to store in iCloud and copy to an external USB drive. VeraCrypt was the first option that came to mind, but then I discovered that macOS can create encrypted disk images without installing another app.
I decided to try both approaches and find out which one makes more sense on a Mac.
What an encrypted container protects
In simple terms, an encrypted container is a file that can be unlocked with a password and mounted as a disk.
macOS and iCloud already include encryption, so why did I want another layer?
First, I wanted to keep an additional copy on an external drive, which could be lost or stolen.
Second, macOS protects my files when my Mac is locked, but it does not keep them secret from every app while I am logged in. macOS restricts access to folders such as Documents and iCloud Drive, but an app I authorize or a process with sufficient access could still read those files. Keeping sensitive files inside a separate encrypted container gives them another locked state when I am not using them.
Creating an encrypted disk image with Disk Utility
Disk Utility comes with every Mac, so you don’t need to download anything.
Creating an encrypted container with it is very easy. Open Disk Utility and choose Blank Image or Image from Folder from the New Image menu.
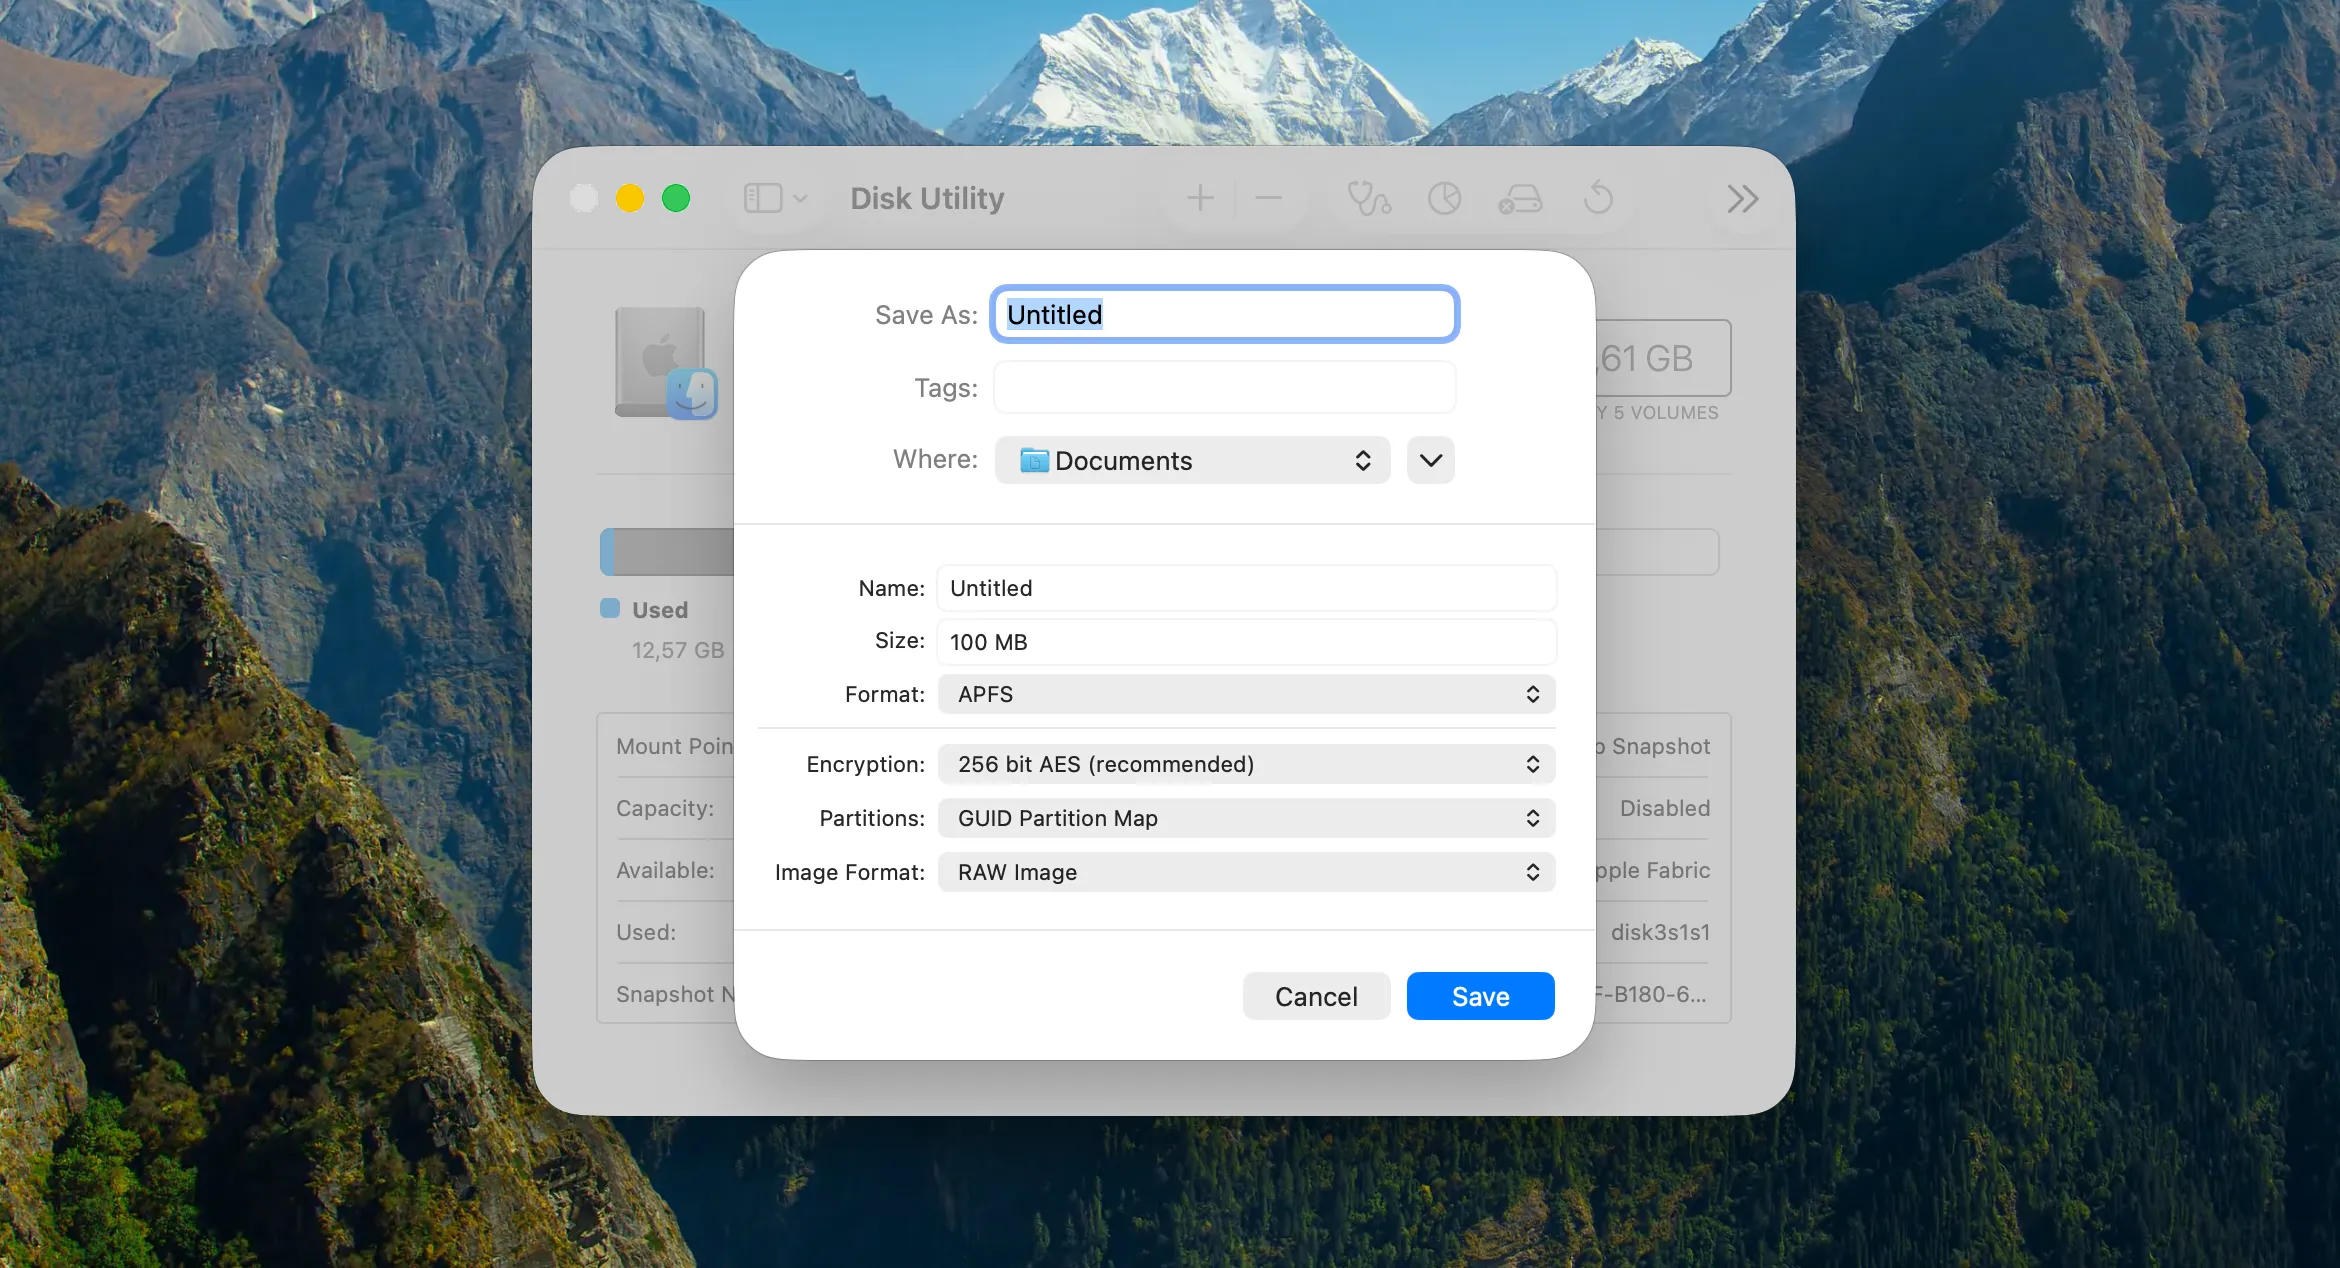
The first option creates an empty container with a size you choose, and you can modify its contents later. The second option takes the contents of an existing folder and puts them inside a disk image. Depending on the selected image format, the resulting image can be read-only or writable.
I planned to edit the content of the disk from time to time, so I went with the first option.
To create an encrypted disk image, you need to select an encryption method in the new disk dialog and enter a password.
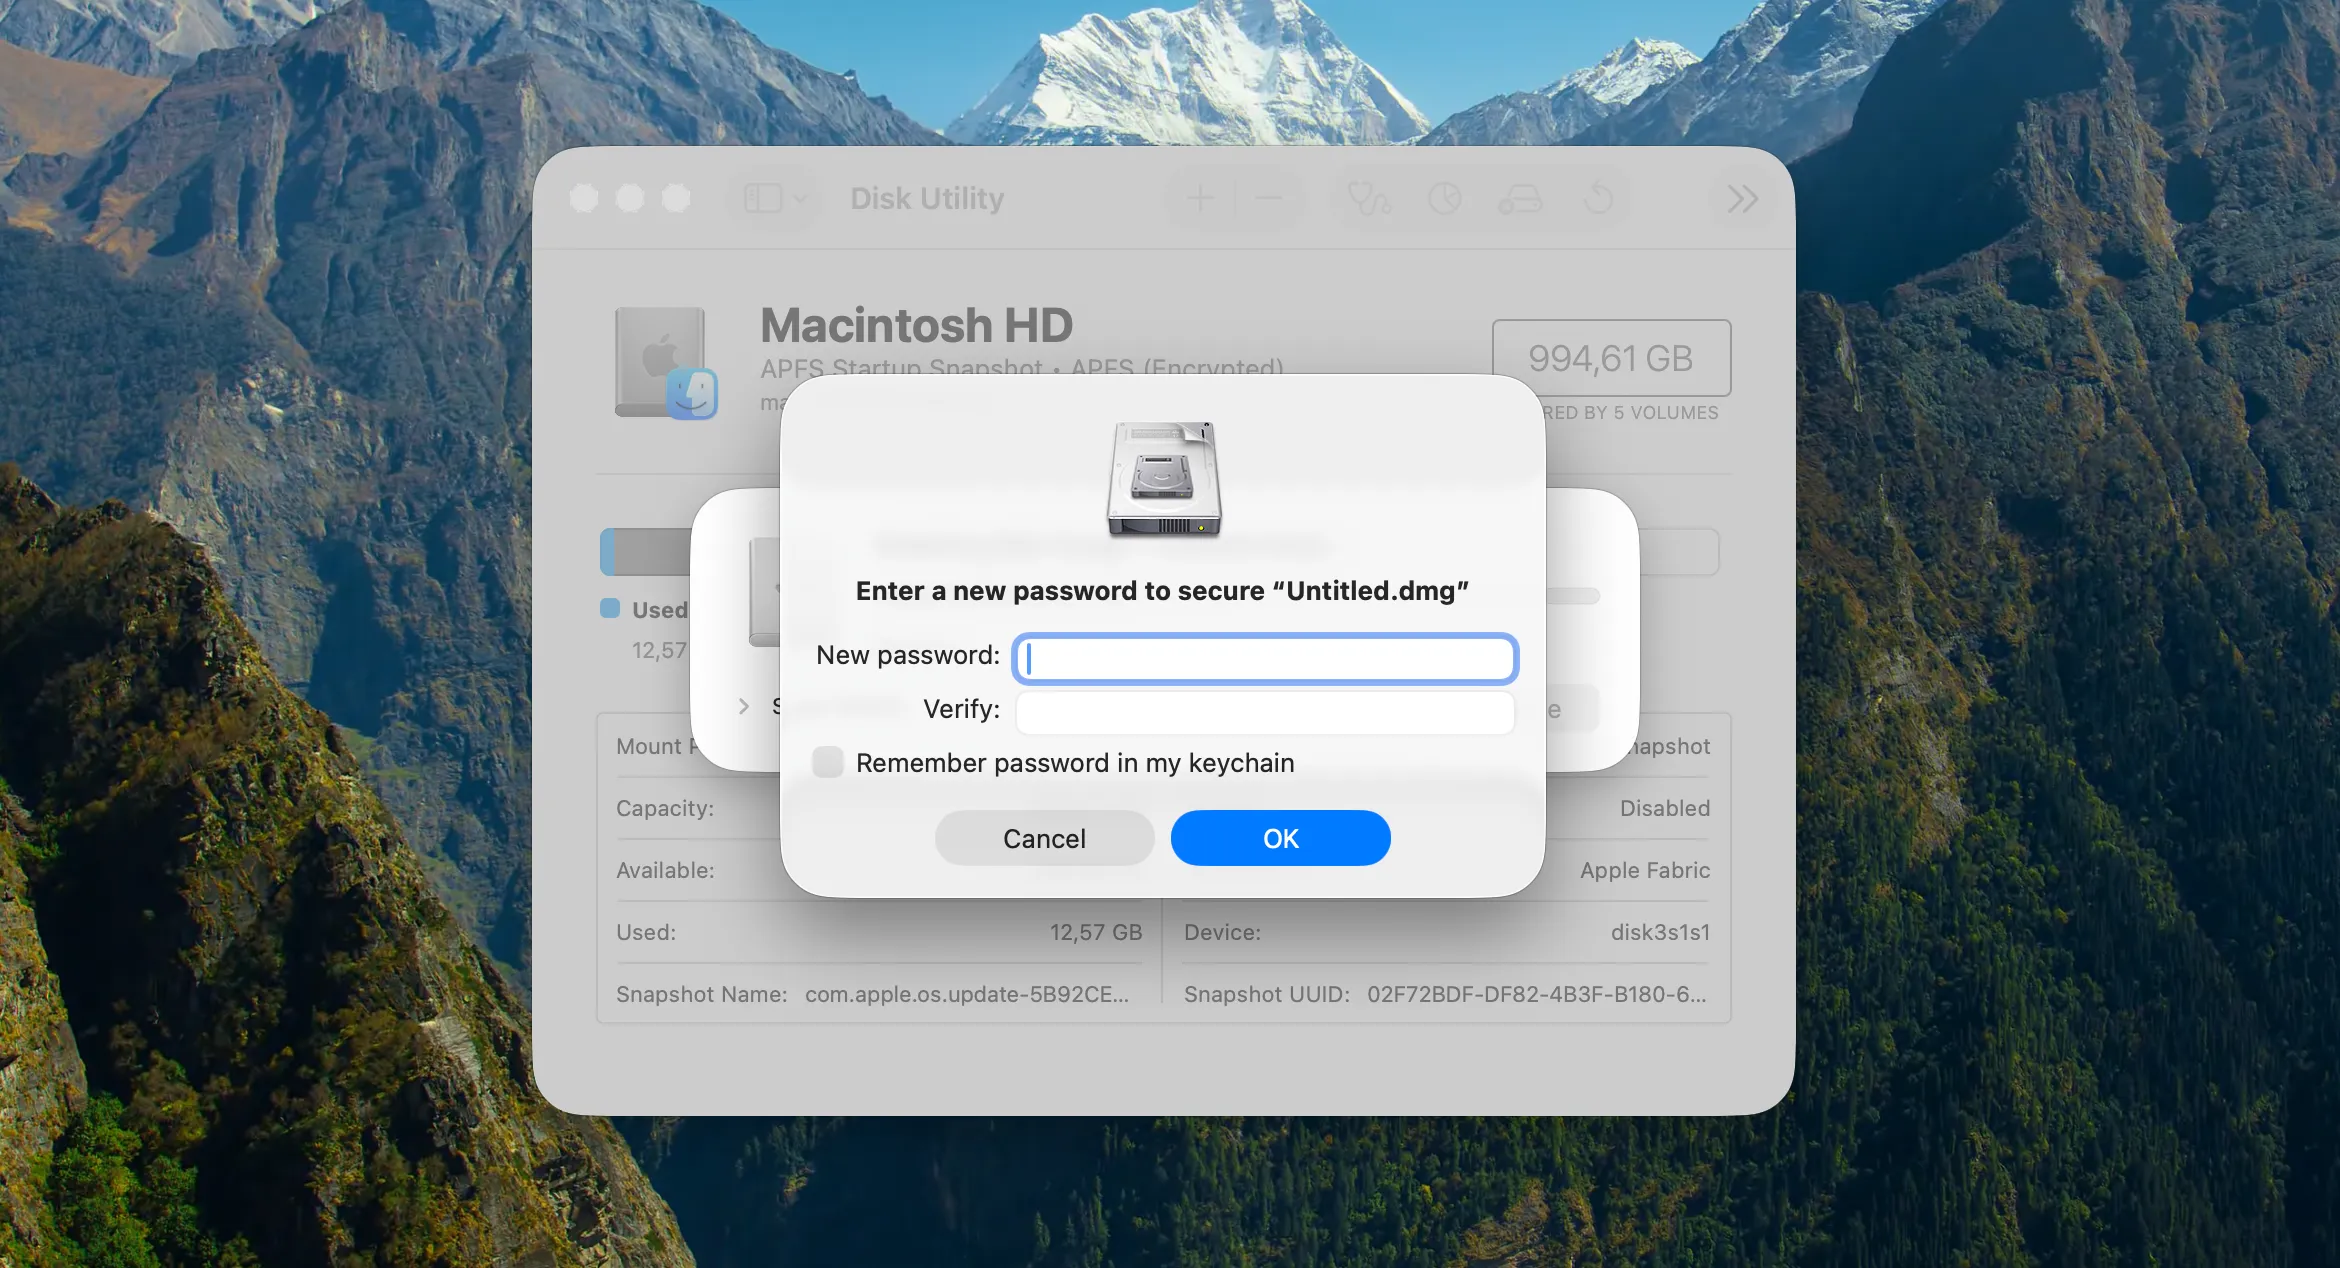
After that, Disk Utility creates the image file in the selected location and mounts it in Finder as a disk drive.
Now you can easily access it and add or remove files from it. When you finish modifying the disk, it’s best to eject it so its contents are no longer accessible without unlocking it again.
When you need to access the protected files or modify the disk contents again, simply double-click the image file. After you enter the correct password, it will be mounted again in Finder.
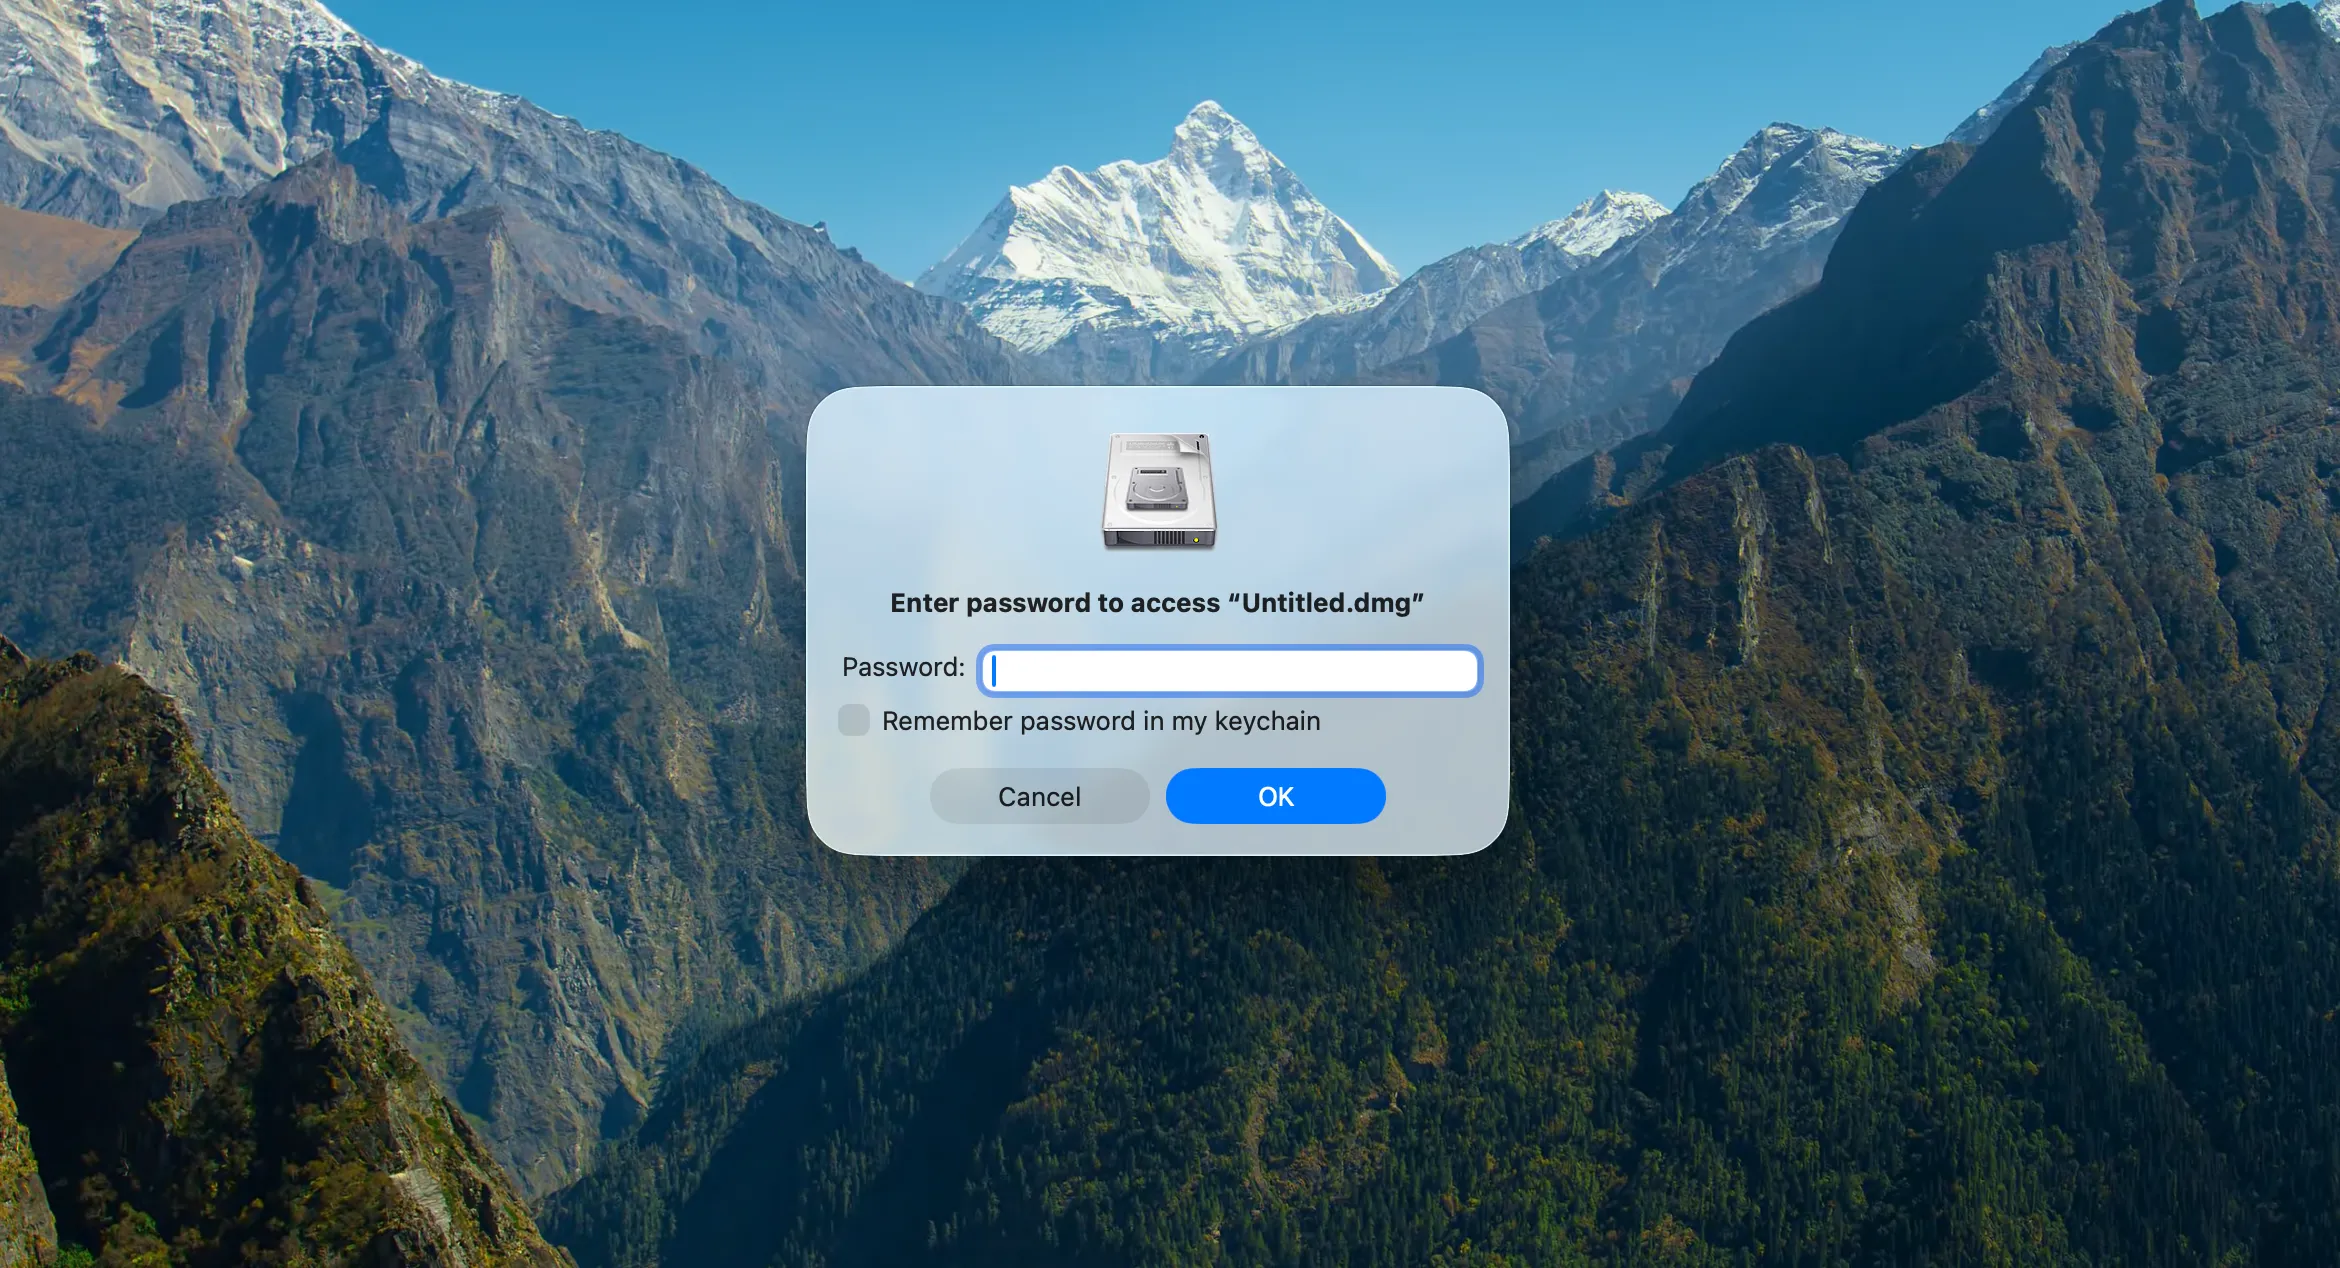
You can also choose to save the password in Keychain. This means macOS can open the image without asking for the password while your login keychain is unlocked. It is more convenient, but it weakens the image’s separate locked state while you are logged in.
Creating an encrypted container with VeraCrypt
Getting VeraCrypt was not straightforward.
First, there are two versions to download from the official website: one that uses macFUSE and another for FUSE-T. I had no idea what they were, so I had to Google them first.
Both macFUSE and FUSE-T are tools that let apps add support for file systems that macOS does not support on its own. VeraCrypt requires one of them to run, so I chose FUSE-T because it was easier to install.
FUSE-T can be installed using the Homebrew command brew install macos-fuse-t/homebrew-cask/fuse-t, or by downloading an installer package from its website.
Installing FUSE-T and VeraCrypt did not ask me to approve a system extension or grant any additional permissions.
After launching the app, I was presented with a main window that looked very familiar to me as an old TrueCrypt user. It has a list of slots where mounted volumes appear and a few buttons underneath for operating the app.
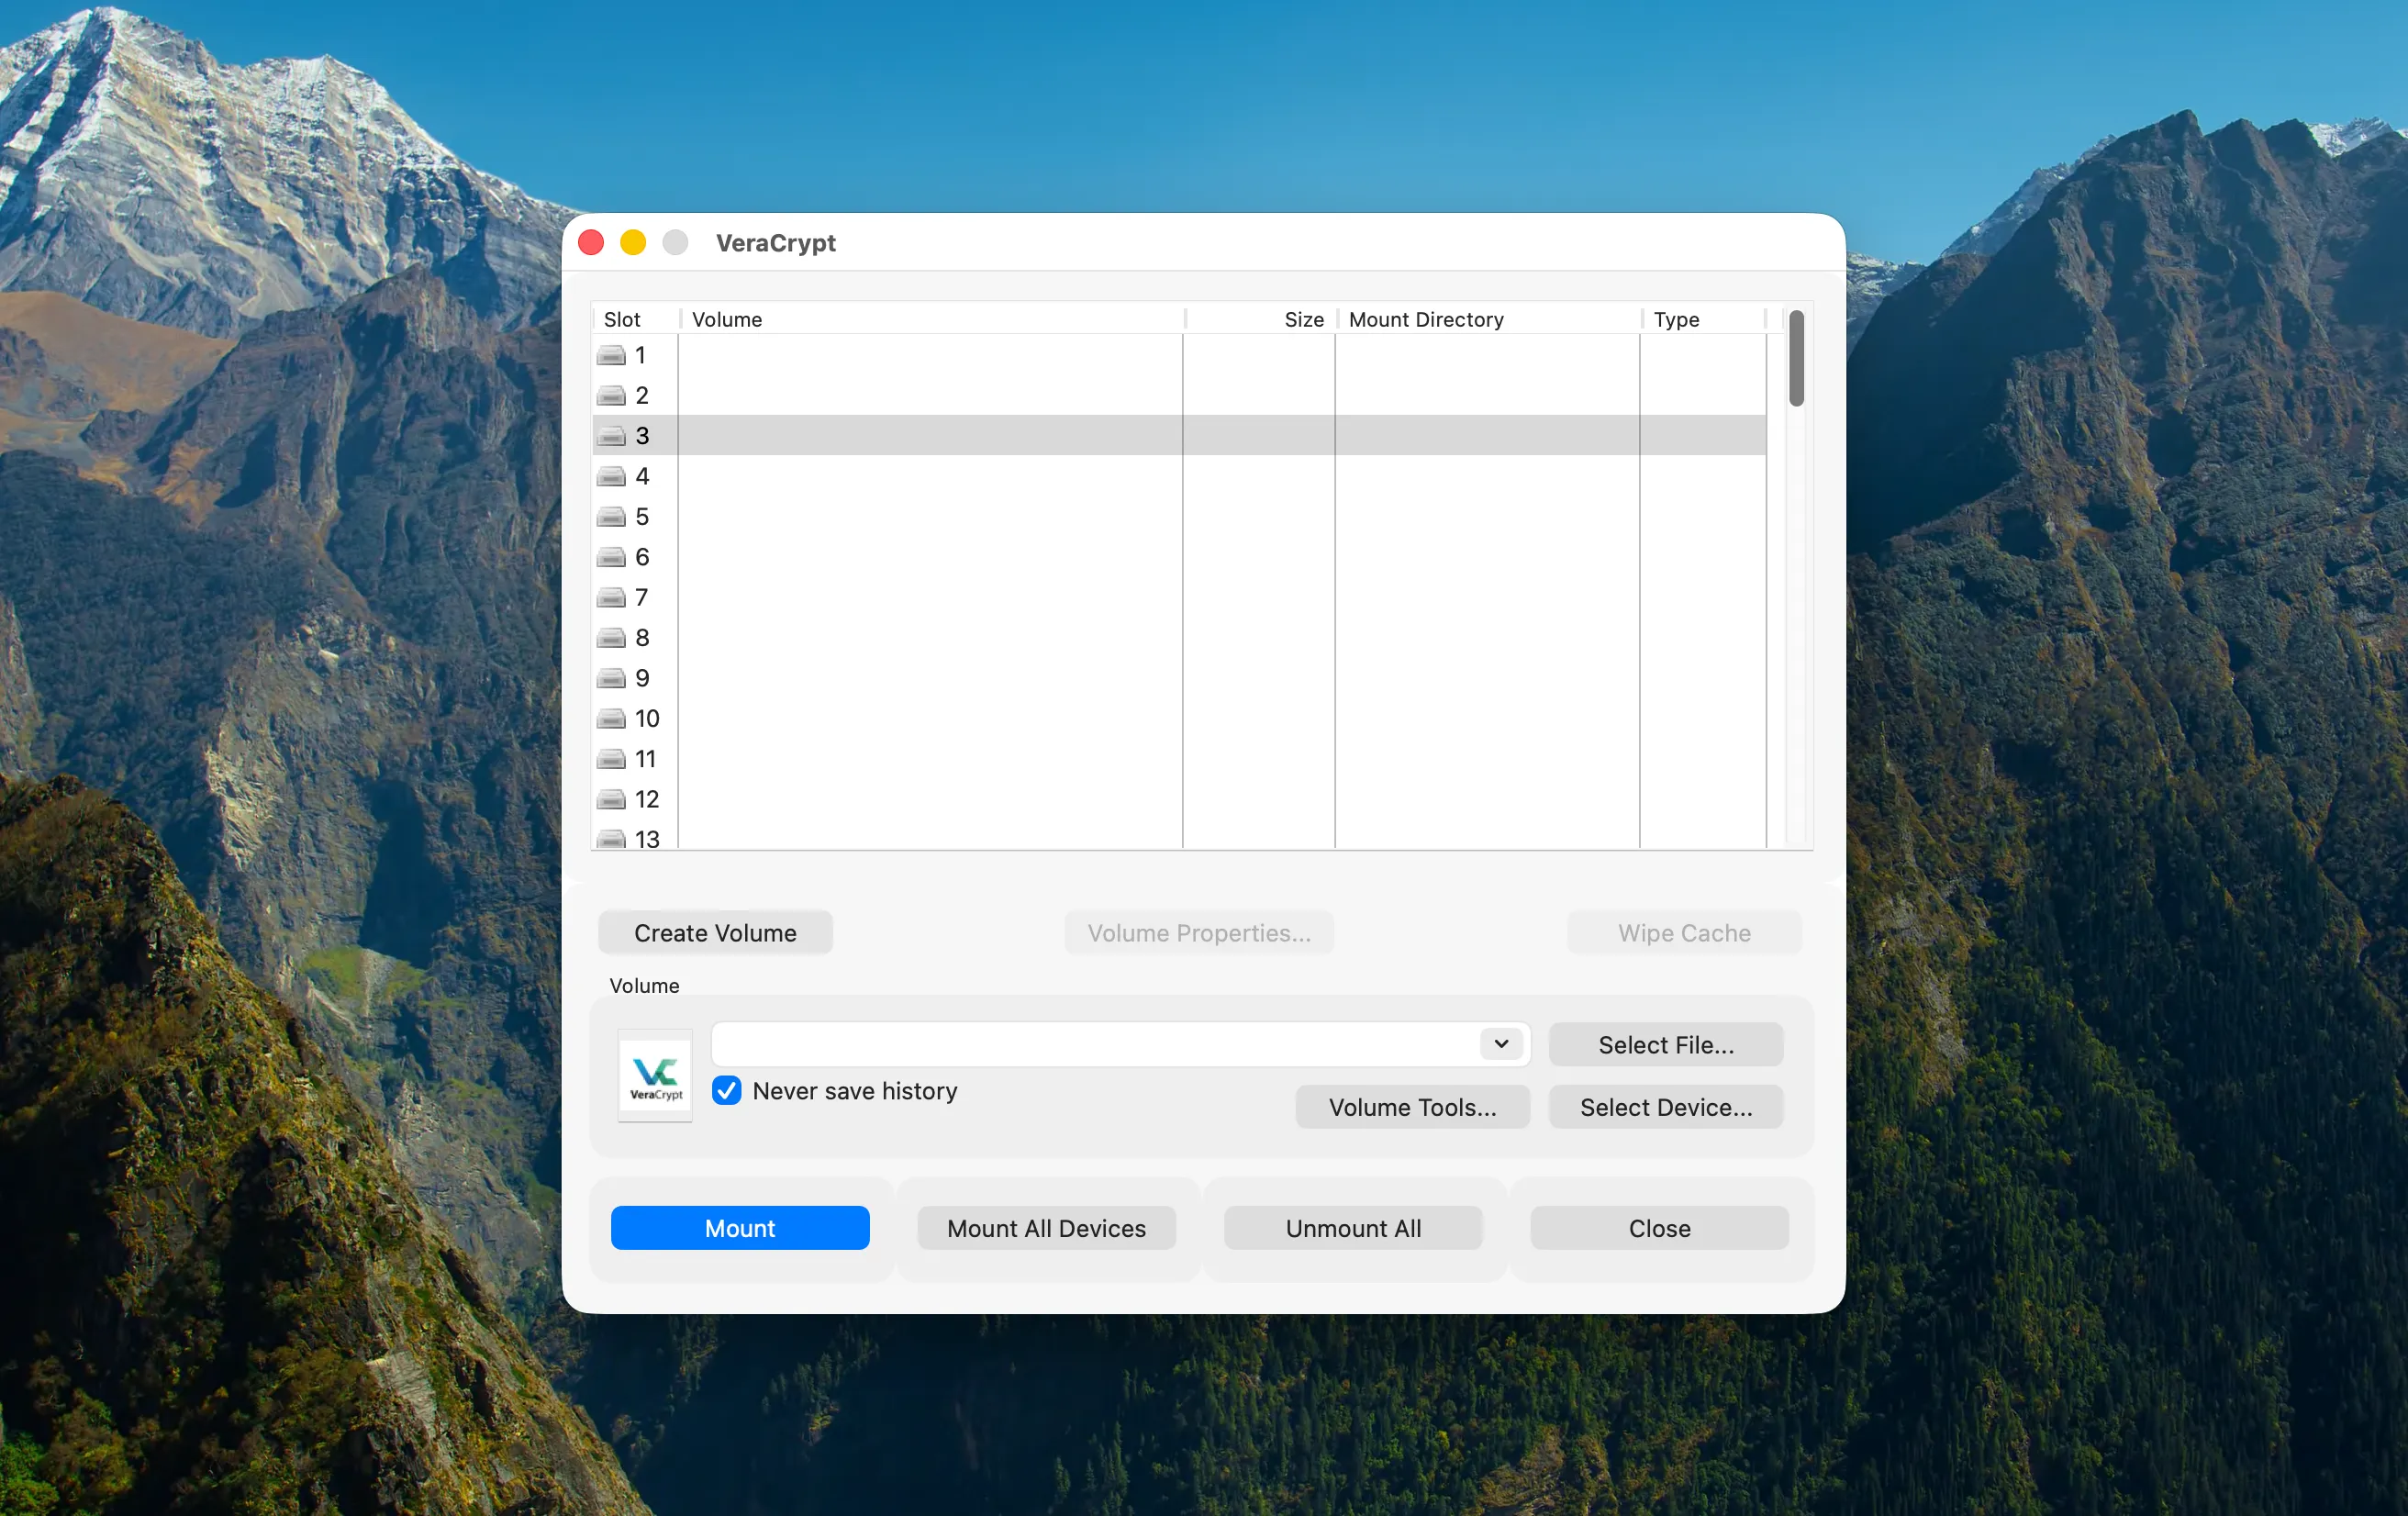
The Create Volume button opens a wizard for creating a new encrypted container. You can create an encrypted file container, encrypt a non-system partition, or encrypt an external drive such as a USB flash drive.
The next window asks you to choose between a standard VeraCrypt volume and a hidden VeraCrypt volume. I chose a standard volume this time, and I’ll explain hidden volumes in the section below.
The next three steps ask you to set the file location, choose an encryption algorithm, and select the volume size.
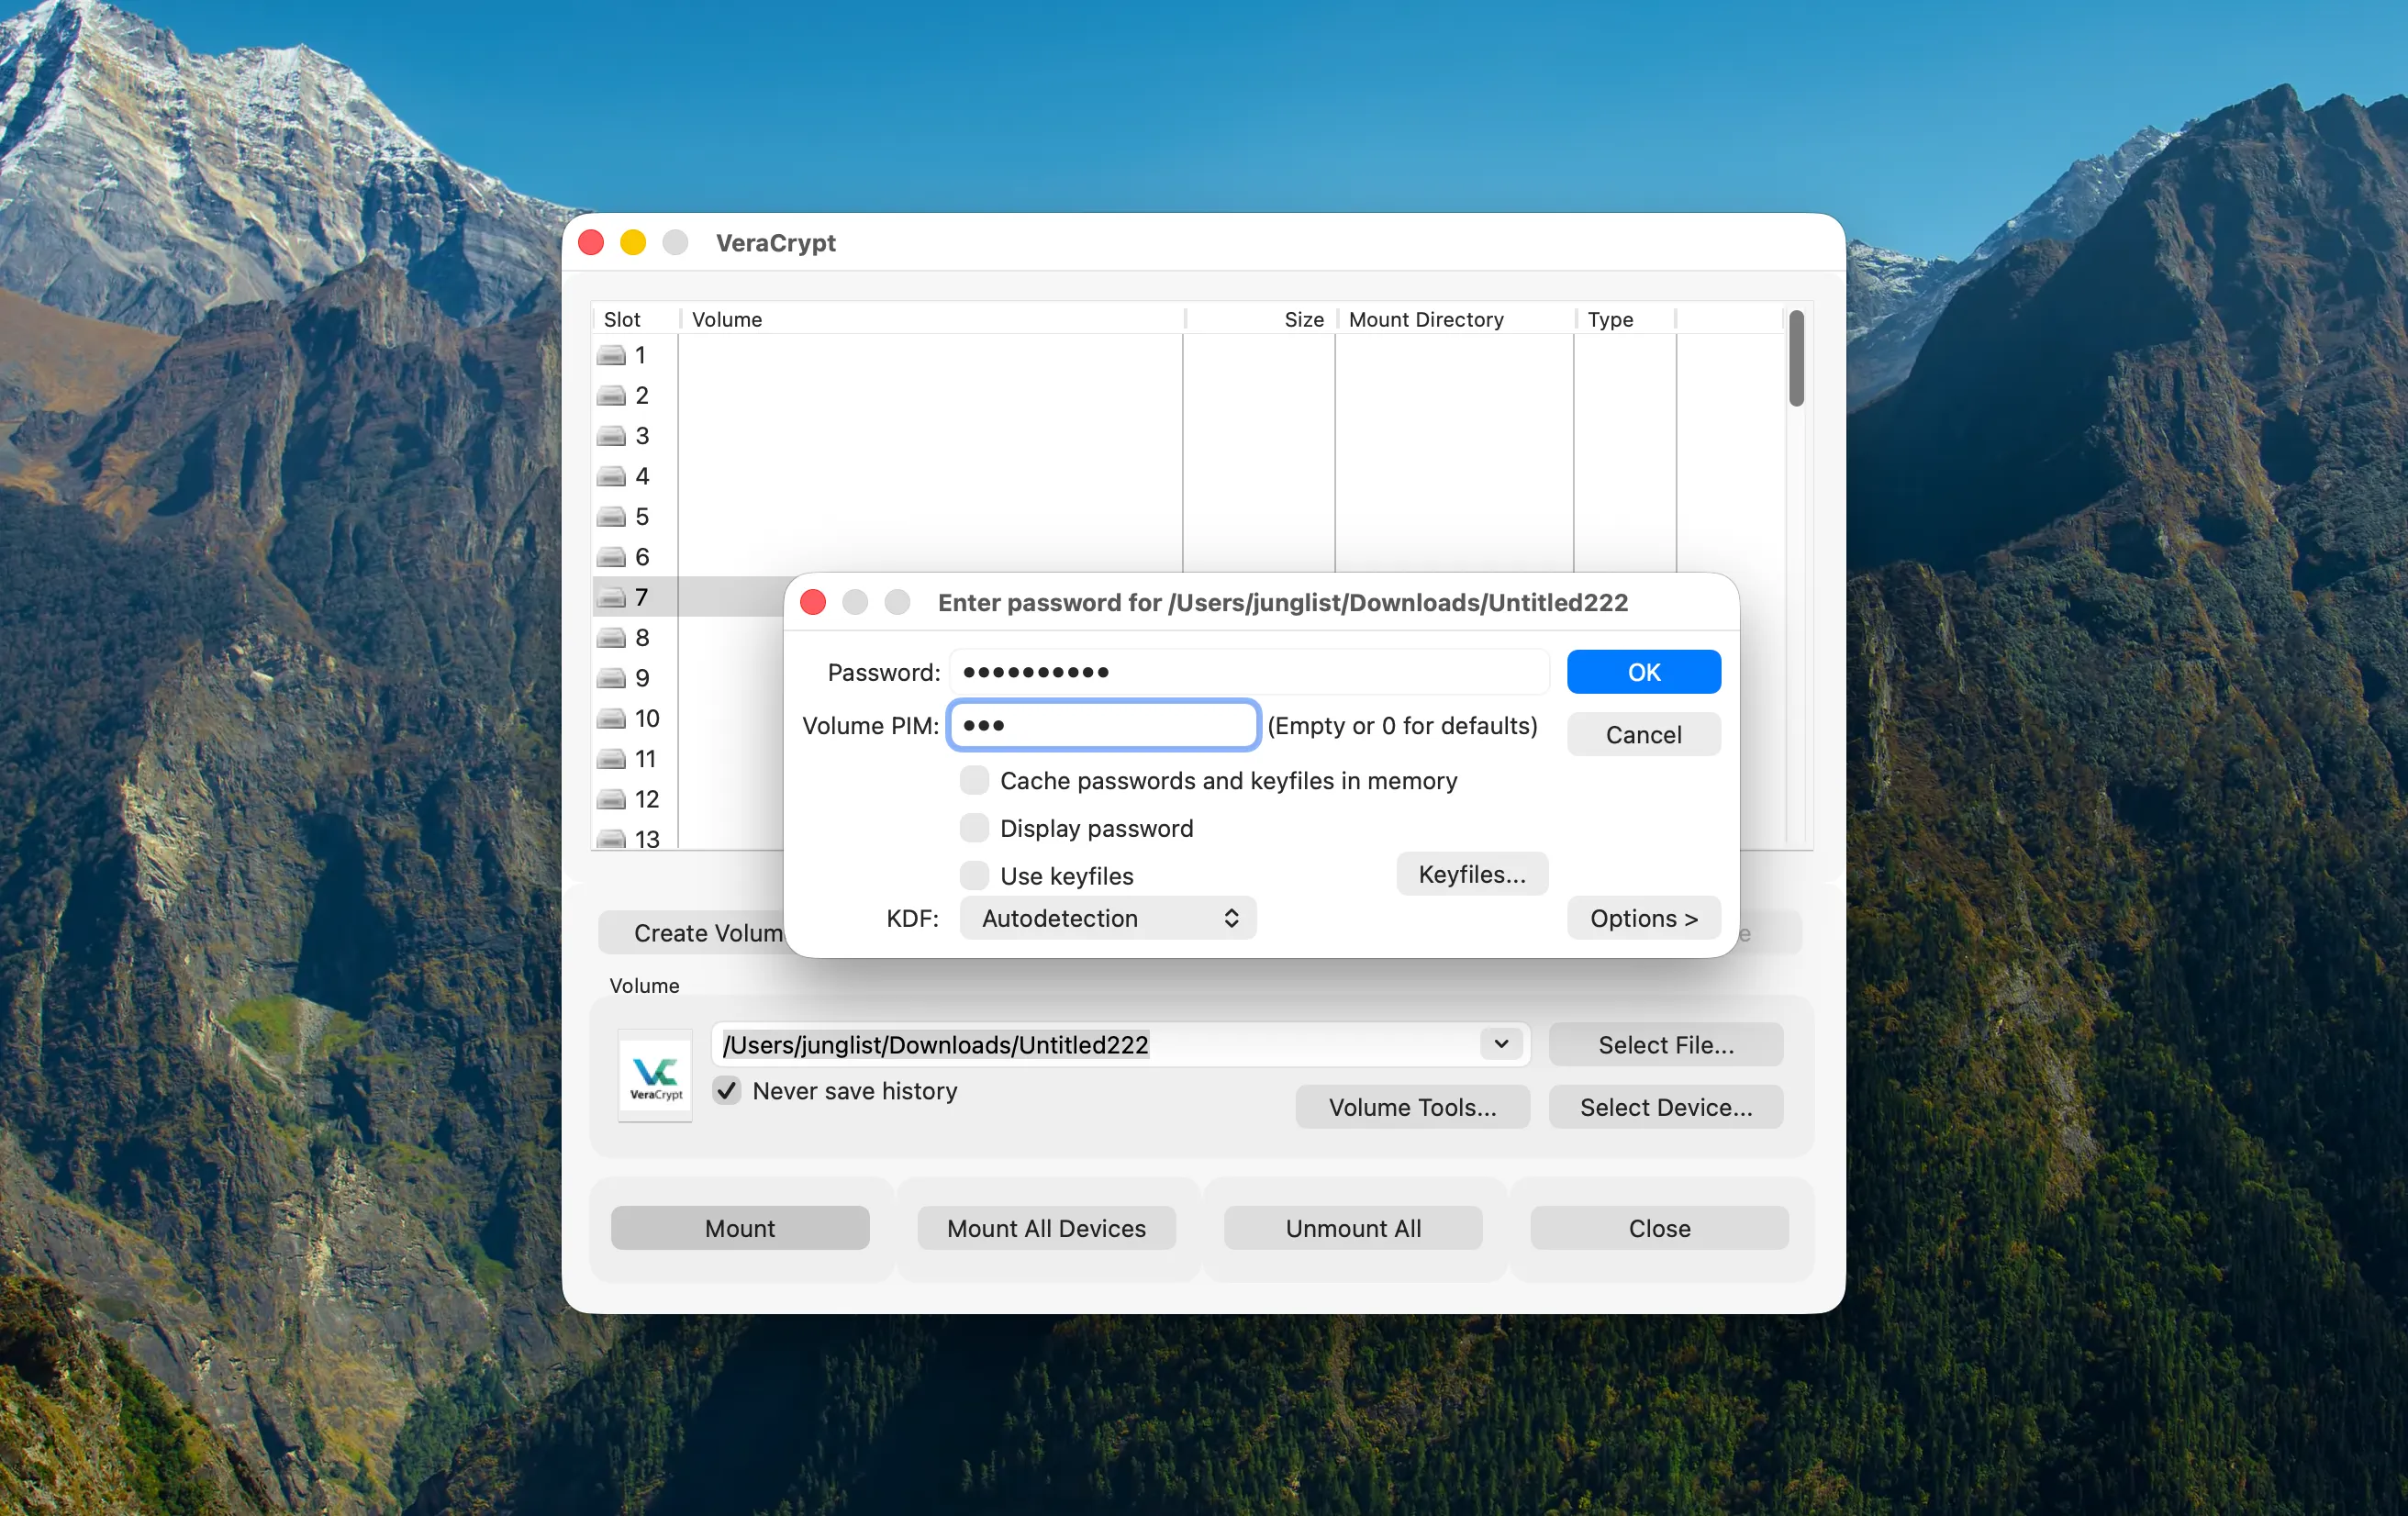
The step after that controls how the encrypted volume is unlocked. You can use a password, a keyfile, or both. VeraCrypt also supports a PIM (Personal Iterations Multiplier), which is an optional secret number that changes how much computational work is required to derive the encryption key. A higher PIM makes both unlocking the volume and brute-force attempts slower, and you must enter the same PIM whenever you mount the volume.
The final step is choosing the file system format, after which VeraCrypt creates the encrypted container.
To mount the container, first select a slot, choose the container file, and click Mount. VeraCrypt then asks for the password and the PIM if you configured one. If they are correct, the encrypted container is mounted and becomes accessible in Finder.
Hidden volumes
VeraCrypt supports a very interesting feature called a hidden volume.
A hidden volume is created inside the free space of another encrypted volume. Entering the password for the outer volume mounts the outer volume, while entering a different password mounts the hidden one. If the volume is created and used according to VeraCrypt’s precautions, it should not be possible to prove that the hidden volume exists. If someone forced you to unlock the container, you could reveal the outer password and show its non-sensitive files while the hidden volume remained undetected.
There is an important risk: writing new data to the outer volume could overwrite and damage the hidden volume. VeraCrypt can protect the hidden volume when mounting the outer one, but this protection must be enabled each time and requires the hidden volume’s password.
I’m not sure whether I’d ever use it personally, but I assume there are people and situations where such a feature is really important.
A small quirk that turned out to be a feature
When I tried to take the first screenshot of VeraCrypt for this post, I noticed something strange. The screenshot was created, but when I pasted it into Pixelmator, the VeraCrypt window was missing. It showed only the background.
I tried taking it a few more times and even pasted it into Preview, but the result was the same.
A quick search revealed that this was actually a security feature. By default, VeraCrypt prevents its windows from appearing in screenshots and screen recordings. You can disable this protection by launching VeraCrypt from Terminal with the --allow-screencapture command-line argument.
Disk Utility and VeraCrypt compared
Disk Utility is simpler and more convenient to use. It is built into macOS and feels at home there. VeraCrypt feels more like a Windows app that was made to run on a Mac. That’s the biggest visual difference between them.
On paper, VeraCrypt is the more capable option. It supports keyfiles, PIM, hidden volumes, and screen-capture protection. It is also available for macOS, Windows, and Linux.
That flexibility comes with additional setup. On a Mac, VeraCrypt requires installing the app and either FUSE-T or macFUSE. Disk Utility is already part of macOS, and creating an encrypted disk image takes fewer steps.
Once the containers have been created, both work in a similar way. They mount as drives in Finder, where you can add, remove, and edit files, and they need to be ejected when you finish using them. Opening a disk image is slightly more convenient because you can double-click it in Finder and save its password in Keychain. With VeraCrypt, you need to open the app, select a slot and the container file, and then mount it.
Both types of containers are stored as regular files, so they can be copied to iCloud Drive or an external USB drive. They should be ejected before being copied or synchronized to avoid saving an incomplete or inconsistent version.
The biggest practical difference is compatibility. An encrypted disk image is a natural choice when it will only be opened on Macs. A VeraCrypt container can also be opened on Windows or Linux.
VeraCrypt clearly offers more, but most of its additional features are useful only in particular situations. The real question is whether you need those features enough to justify the additional setup and give up some of the convenience that Disk Utility provides.
Which one should you use?
For my copies in iCloud and on a USB drive, I will use an encrypted disk image created with Disk Utility. I only need to open it on a Mac, so VeraCrypt’s cross-platform support is not important to me. Disk Utility is already installed, easier to use, and does everything I need.
VeraCrypt makes more sense if you need to open the same container on Windows or Linux, or if you need features such as keyfiles, PIM, or hidden volumes. Otherwise, its less convenient day-to-day workflow may not be worth those additional features.
Neither option is better in every situation. For a simple Mac-only workflow, I think Disk Utility is the more practical choice.
Whichever option you choose, remember that this extra protection helps only while the container is closed and ejected. Once it is mounted, its contents are accessible like other files and could also be read by apps or processes with sufficient access. A forgotten password or damaged container may make the files impossible to recover, so encryption does not replace keeping backups.